Bing Info

Tech Insights & Digital Innovation
Header Mobile Fix

Bing Info

Time Inference System with FastAPI

Building a Scalable and Intelligent Real-Time Inference System with FastAPI

Building a Scalable and Intelligent Real-Time Inference System with FastAPI Let’s be honest for a moment: You’ve made a great machine learning model that works nicely in your Jupyter notebook. It can tell the future faster than you can blink. Then reality sets in: you need to put it on the internet so other people can use it. Now you’re looking at a blank screen and thinking, “How do I serve this thing without setting my server on fire?” If that sounds familiar, you’re not alone. It’s not enough to just wrap your model with HTTP endpoints to make an inference API that works in production. You need something that can manage hundreds or thousands of requests at the same time without crashing. You need answers in milliseconds, not seconds. When things go wrong, your system needs to be up and running. That’s where FastAPI comes in. It is not just very fast, but its async-first design makes it great for machine learning inference systems that need to handle a lot of queries in real time. In this article, we’ll show you exactly how to construct a production-ready FastAPI backend that drives real-time inference. We’ll talk about everything from basic model serving to more advanced patterns like streaming responses, Redis caching, WebSocket integrations, and deployment strategies that actually work. By the end of this article, you’ll know: Why FastAPI is better than other Python frameworks for ML inference; How to structure your inference API for maximum performance; Real-world patterns for handling concurrent requests without blocking; How to cache predictions and cut latency from hundreds of milliseconds to single digits; WebSocket implementation for live inference feeds; Error handling, monitoring, and production deployment strategies; and Let’s build something that scales. Why FastAPI Wins for Real-Time Inference Before we get into the code, you need to know why FastAPI is the best choice for inference systems. Traditional Python frameworks like Flask are synchronous. Your code processes one request all the way through before moving on to the next one. Think of a supermarket shop with just one cashier. They finish ringing up one customer before moving on to the next one. Flask. FastAPI is built on ASGI (Asynchronous Server Gateway Interface), which works in a different way. If a request comes in and has to wait for something, like a database query or an external API call, FastAPI stops it and takes care of other requests in the meanwhile. It’s like having one great cashier who can help ten customers at once by switching between them when someone wants to swipe their card. This is what concurrency without threads implies for machine learning APIs: FastAPI uses Python’s asyncio event loop. With just one process, your server can handle thousands of connections at once. Flask would need threads or many processes, which would add extra work and make things more complicated. Sub-millisecond latency means no context switching overhead. When your model is done making a prediction, the answer gets out right away. You may use async PostgreSQL, async Redis, and async MongoDB with the built-in async database support. Your database actions don’t stop other requests from going through. Automatic Request Validation: Pydantic models check the input data before it gets to your model code. Bad requests fail quickly. Auto-generated API documentation gives your endpoints live Swagger UI and ReDoc docs. No further work is needed. Case Study: One organization switched from Flask to FastAPI for credit-risk scoring. Before: 900ms of lag and timeouts every now and then. After: 220ms of latency, 99.98% uptime, and infrastructure expenses that are 38% cheaper. Same model, same hardware, different framework. Here’s an infographic summarizing the benefits of FastAPI for ML inference: Let’s start with the basics and build up to your FastAPI inference server. Here’s a basic ML model inference endpoint: code Python from fastapi import FastAPI from pydantic import BaseModel import joblib import numpy as np app = FastAPI() # Load model once at startup model = joblib.load(‘my_model.joblib’) class PredictionRequest(BaseModel): features: list[float] class PredictionResponse(BaseModel): prediction: float confidence: float @app.post(“/predict”) async def predict(request: PredictionRequest): “””Make a single prediction””” features = np.array(request.features).reshape(1, -1) prediction = model.predict(features)[0] confidence = model.predict_proba(features)[0].max() return PredictionResponse( prediction=float(prediction), confidence=float(confidence) ) This works, but it’s missing several things production systems need: Model loading happens on every request No error handling CPU-bound model inference blocks the event loop No way to handle high concurrency No caching for repeated predictions Let’s fix this step by step. Pattern 1: Proper Model Loading with Application Lifespan Your biggest performance killer is loading the model repeatedly. Do it once when the server starts. code Python from contextlib import asynccontextmanager import logging logger = logging.getLogger(name) # Global model storage ml_models = {} @asynccontextmanager async def lifespan(app: FastAPI): # Startup: Load models once logger.info(“Loading ML models…”) ml_models[“classifier”] = joblib.load(‘classifier.joblib’) ml_models[“vectorizer”] = joblib.load(‘vectorizer.joblib’) logger.info(“Models loaded successfully”) yield # Application runs here # Shutdown: Clean up resources logger.info(“Cleaning up models…”) ml_models.clear() app = FastAPI(lifespan=lifespan) @app.post(“/predict”) async def predict(request: PredictionRequest): model = ml_models[“classifier”] # Use model… This approach loads your model once when the server starts. No I/O that happens more than once. No cycles wasted. Your inference endpoint merely takes the model that was already loaded and runs with it. Here’s an illustration of the model loading process: Pattern 2: Async Model Inference with Thread Pooling. Here’s a little but important point: scikit-learn and most ML libraries are synchronous. They will stop Python’s event loop. Don’t fight it. Use run_in_threadpool to offload CPU-bound work to a thread pool. code Python from starlette.concurrency import run_in_threadpool import asyncio @app.post(“/predict”) async def predict(request: PredictionRequest): model = ml_models[“classifier”] features = np.array(request.features).reshape(1, -1) # Run blocking model inference in thread pool prediction = await run_in_threadpool(model.predict, features) confidence = await run_in_threadpool( lambda: model.predict_proba(features)[0].max() ) return PredictionResponse( prediction=float(prediction[0]), confidence=float(confidence) ) Why does this matter? The event loop is still open. FastAPI takes care of other requests while model inference runs in a thread. You can have real parallelism without blocking. Here’s a diagram showing how run_in_threadpool prevents blocking: Pattern 3: Redis

Building a Scalable and Intelligent Real-Time Inference System with FastAPI Read More »

deployment-strategies

Smart Deployment Strategies: Powerful A/B Testing, Seamless Canary Releases, and Safe Shadow Mode

Smart Deployment Strategies: Powerful A/B Testing, Seamless Canary Releases, and Safe Shadow Mode Listen, deploying new software or machine learning models can feel like walking a tightrope without a safety net. One wrong move and boom—your users are facing bugs, your system’s down, and you’re scrambling to fix things at 2 AM. But here’s the thing: you don’t have to take those kinds of risks anymore! Modern deployment strategies like A/B testing, canary releases, and shadow mode are basically your safety nets. They let you test new features, roll out updates gradually, and catch problems before they spiral out of control. And the best part? They’re not just for massive tech companies anymore. Whether you’re deploying a simple app update or a complex ML model, these strategies can save your bacon. In this post, we’re gonna break down exactly how these three deployment strategies work, when to use each one, and what makes them different from other approaches like blue-green deployments. We’ll also dive into a real-world case study and give you actionable steps to implement these strategies yourself. By the end, you’ll know which strategy fits your needs and how to roll it out without breaking a sweat. What Are Deployment Strategies and Why Should You Care? Deployment strategies are basically game plans for getting your software from development into production. Think of ’em as different ways to introduce changes to your users without causing chaos. Here’s why they matter: according to recent data, over 78% of organizations now use DevOps practices that include advanced deployment strategies. Companies that nail their deployment approach see fewer incidents, faster recovery times, and happier users. On the flip side, poor deployment practices are behind roughly 60-70% of production incidents. The traditional “big bang” approach—where you just push everything live all at once—is basically rolling the dice with your users’ experience. Modern strategies give you way more control and drastically reduce risk. The Big Three: Shadow Mode, Canary Releases, and A/B Testing Let’s get into the meat of it. These three strategies might sound similar at first, but they each solve different problems and work in unique ways. Shadow Mode Deployment: Testing Without the Fear Shadow mode (also called “dark launch”) is like having a dress rehearsal before opening night. Your new version runs alongside the old one, processing real production traffic, but here’s the kicker—users never actually see the results from the new version. How it works: Every request that hits your production system gets duplicated. The live version responds to users normally, while the shadow version processes the same request in the background. You capture and compare the outputs, but only the live version’s response actually goes back to users. When to use it: Shadow mode shines when you’re testing machine learning models or making significant infrastructure changes. It’s perfect for situations where you need to validate performance with real-world data but can’t risk affecting users. For example, if you’ve trained a new recommendation algorithm, shadow mode lets you see how it performs against actual user behavior without changing anyone’s experience. AWS even offers specific tools for this—their SageMaker shadow deployment supports offline, synchronous, and asynchronous approaches. The trade-offs: Shadow mode requires roughly double the infrastructure since you’re running two systems simultaneously. You’re basically paying for extra compute, storage, and network resources. Plus, you gotta be careful with side effects—your shadow system shouldn’t trigger duplicate emails or payment transactions. Canary Releases: Slow and Steady Wins the Race Canary deployments are named after the “canary in a coal mine” concept. You release your new version to a small group of real users first. If things go well, you gradually increase the percentage until everyone’s on the new version. How it works: You start by routing maybe 5-10% of traffic to the new version. Monitor closely for errors, performance issues, or user complaints. If everything looks good, bump it up to 25%, then 50%, then 100%. If something breaks, you can quickly roll back before most users are affected. When to use it: Canary deployments are your go-to when you need to test with real users and real-world conditions but want to limit your blast radius. They’re great for consumer-facing apps where user feedback matters and you can’t perfectly replicate production in staging. Netflix famously uses canary deployments as part of their release process. They route a small percentage of global traffic to new versions and monitor metrics like error rates and latency before expanding the rollout. The trade-offs: Canary deployments take longer than blue-green switchovers. You might spend hours or even days monitoring before you’re confident enough to proceed. They also require sophisticated traffic routing and monitoring infrastructure. Database changes can get tricky too, since you need backward compatibility between versions. A/B Testing Deployment: Let the Data Decide A/B testing is less about risk mitigation and more about optimization. You’re not just checking if the new version works—you’re actively comparing it against the old version to see which performs better. How it works: You split your users into groups. Group A sees the current version, Group B sees the new version. You track specific metrics like conversion rates, engagement, or revenue. After collecting statistically significant data, you pick the winner and deploy it to everyone. When to use it: A/B testing is perfect when you’re experimenting with features, UI changes, or business logic where user behavior is the deciding factor. It’s especially powerful for e-commerce, content platforms, and any product where small changes can have measurable business impact. Companies like Netflix report that 80% of content views come from their recommendation engine, which is continuously optimized through A/B testing. Hubstaff ran split tests on their homepage and saw a 49% increase in sign-ups. The trade-offs: A/B tests require large sample sizes to reach statistical significance. You typically need thousands of users per variation to get reliable results. They’re also slower than other strategies—you need to run the test long enough to account for behavioral variations throughout the week. And unlike other

Smart Deployment Strategies: Powerful A/B Testing, Seamless Canary Releases, and Safe Shadow Mode Read More »

mlops-for-startups

MLOps for Startups: Doing More with Less

Introduction to MLOps for Startups: Getting More Done with Less Your ML models aren’t useless; they’re just stuck. You’ve made a very good machine learning model. Your accuracy numbers look great. Your group is happy. Then you wake up and realize that the model is in a Jupyter notebook and has nothing to do with your users. Welcome to the “Model Graveyard,” where 60% of machine learning projects fail before they are put into use. A lot of new businesses end up here. You have smart engineers, not much money, and a lot of hype about AI. But there is a huge gap between the code and the customers. You have to train models, put them into use, keep an eye on how well they work, and retrain them when they stop working well, all without hiring a lot of DevOps experts or spending all your money on cloud bills. MLOps (Machine Learning Operations) is the answer to that problem. This post is for you if you’re a founder, CTO, or engineer at a startup and you’re wondering how to get your models into production without spending as much as Netflix or Google. We’ll show you how MLOps really works for small teams, where money is wasted, and give you proven tips from startups that are doing it right. By the end, you’ll know why MLOps is a must for any serious AI startup and how to do it without spending a lot of money. What you’ll learn: Why MLOps is a competitive advantage for you, not a cost drain What makes DevOps and MLOps different (they’re not the same) Tools and strategies that are cheap and work for scrappy teams A real-life example of how good MLOps saved a startup $50,000 a month Real answers to the questions that every new business has about AI What is MLOps, really? Let’s start with the boring truth: MLOps is just good software engineering that works with machine learning. DevOps as we know it today is all about taking application code, automating its deployment, and making sure it runs smoothly in production. MLOps takes that idea and applies it to machine learning workflows, which are more complicated because they involve data, models, experiments, and continuous retraining, not just code. This is the main difference: DevOps is all about code. Your app stays stable after you release version 1.0. You send out updates, but the app always works the same way. Models and data are the main things that MLOps works with. Your model that was trained on data from yesterday might not work as well today. Things in the real world change. People act in different ways. Your model gets worse. You need to keep an eye on things all the time, retrain them automatically, and have smart rollback systems in place, all without waking up your whole team at 3 AM. Think of MLOps as the pipes that make your AI work. It’s not showy. No one celebrates it. But without it, your model will eventually fail without anyone knowing, give real users bad predictions, and ruin trust in your product. What’s ironic? Startups that use MLOps correctly move faster and spend less than those that don’t. The Three Most Common Misunderstandings About MLOps Myth 1: “We need enterprise MLOps platforms that cost $500,000 a year” No, you don’t need to. Most enterprise platforms are made for businesses that have hundreds of teams working on thousands of models. Your startup probably needs one platform that is easy to understand, easy to keep up with, and only grows when you’re ready. The best thing is? MLflow, Kubeflow, and DVC are all open-source tools that are free. They don’t belong in the “second class” because they power a lot of startups and are used by a lot of businesses. Myth 2: “MLOps takes the place of Data Scientists and ML Engineers” MLOps is a specialization, not a replacement. You will need people who know how to set up and monitor ML pipelines and deployment infrastructure. But AI will not get rid of the job; it will make it better. Like CI/CD didn’t kill developers, it made them more productive. The Emerging Jobs report from LinkedIn says that MLOps jobs have grown 9.8 times in five years. The field is also adding new areas of expertise, such as FinOps (cost optimisation for AI) and AIOps (AI for IT operations). Myth 3: “We’ll figure out how to make it later. Let’s just train models now.” This is how technical debt happens in real life. It costs five to ten times more to fix a broken deployment pipeline or add monitoring after the fact than it does to build it in from the start. Startups that don’t think about MLOps until later always say that it takes longer to get to market and costs more to build infrastructure. What is the real difference between MLOps and DevOps? The way they work is very different, even though they sound the same. DevOps and MLOps are two different things. Feature DevOps MLOps Main Artifact Application code and binaries Models, datasets, features, and hyperparameters Versioning Code repository (Git) Code + Data + Model + Config (needs special tools like DVC) Deployment Build → Test → Deploy (fairly stable) Build → Train → Validate → Deploy → Monitor → Retrain (iterative and data-driven) Monitoring Performance of the application (uptime, latency, errors) Model (accuracy, drift, data degradation) Redeployment Trigger Engineers push new code Data drift is found, performance threshold is crossed, or retraining is scheduled. Testing Complexity Unit tests, integration tests, and E2E tests Unit tests plus data validation, model performance tests, and bias/fairness checks Dependencies Standard libraries Runtimes, GPUs, certain CUDA versions, ML frameworks, and data pipelines The main point is that MLOps needs to keep an eye on changes in data and model behavior, not just code changes. This is a lot harder than regular DevOps. A Case Study on the Real Cost of Doing MLOps Wrong Let’s

MLOps for Startups: Doing More with Less Read More »

how-to-deploy-an-ml-model

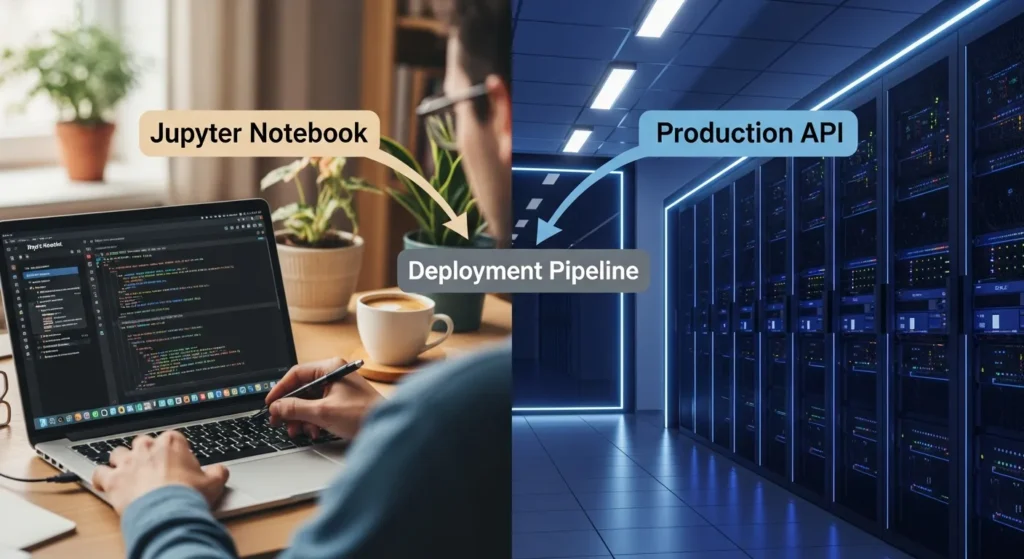
How to Deploy an ML Model: From Jupyter Notebook to Production API

How to Deploy an ML Model: From Jupyter  Notebook to Production API Introduction: No one tells you this when you’re learning machine learning: building a model and deploying it are two very different things. You can make a great model in your Jupyter notebook that works 95% of the time, but if you can’t get it to work in the real world, where real people can use it, it’s just an expensive homework assignment. I’ve been there. I worked on a model for weeks, ran it a thousand times on my own computer, and then realised I had no idea how to share it. That’s when the real learning started, and that’s what this post is about. By the end of this guide, you’ll know how to turn that beautifully trained model in your notebook into a live API that can handle real requests, grow with demand, and actually serve users. We’ll go over every step: serialisation, containerization, picking the right framework, picking a platform, and yes, even the monitoring part that everyone skips but shouldn’t. This guide covers everything from launching your first side project to shipping models for thousands of users. Why Deployment is Where the Real ML Work Happens Most data science courses end with “Congrats! Your model works!” But that’s not the finish line. That’s the starting gun. Everything changes when your model goes from your laptop to production. You are no longer working with a controlled dataset on your computer. Now you have real data, edge cases, different hardware, concurrency problems, and worst of all, users who really need your predictions to work. The biggest mistake I see beginners make is they train their model and then ask, “How do I put this on a website?” But that’s not the right question. The right question is, “How do I make my model a reliable service?” Deployment isn’t just about technology. It’s about being responsible, reliable, and able to reproduce. Your model needs to: Work the same way in different environments Handle errors well when something goes wrong Scale well when demand goes up Stay accurate as real-world data changes It is easy to monitor, so you know when it breaks This is why most companies spend 80% of their ML time on deployment and monitoring instead of building models. Welcome to the real world. Before we start coding, let’s figure out what we’re really doing with the Deployment Pipeline. This is the whole trip: You could say that your Jupyter notebook is the plan. The deployed model is the real building that thousands of people use every day. Each step is very important. Step 1: Getting Your Model Ready for Deployment Your Jupyter notebook isn’t meant for production. It has code for exploring, comments, and maybe even some debugging sessions that got pizza on them. We need to clean this up. Save Your Trained Model After training, your model is stored in memory. It’s gone as soon as you close your notebook. So first, we serialize it, which means turning it into a file that can be loaded and used later. For most sklearn and tree-based models, use joblib (which is faster than pickle for numpy arrays): code Python # After you train your model model = RandomForestClassifier() model.fit(X_train, y_train) # Keep it joblib.dump(model, ‘model.pkl’) For deep learning (TensorFlow, PyTorch), use formats that are specific to the framework, like: code Python # PyTorch torch.save(model.state_dict(), ‘model.pth’) # TensorFlow model.save(‘model.h5′) Why use joblib instead of pickle?Joblib is the industry standard for working with large numpy arrays because it works better. Pickle works too, but it’s slower for complicated models. Don’t just serialize the raw model; make a prediction function. Put it in a clean prediction function like this: code Python def predict(input_features): “”” Takes raw input, processes it, and makes a prediction. “”” # Preparing processed_features = preprocess(input_features) # Load the model (or think it’s already loaded) prediction = model.predict(processed_features) # After processing result = format_output(prediction) return result This is more important than you might think. In production, raw model predictions aren’t enough. You have to deal with missing values, make sure inputs are in the right format, and make sure outputs are always in the right format. Building this into one function keeps your API code clean. Step 2: Choose Your API Framework Now we need to make your model available as an API, which is a service that takes requests and gives predictions. Flask: The Classic Choice Best for: Traditional web apps, simple APIs, when you need full control Flask is lightweight, has massive community support, and feels familiar if you’ve done web development. Here’s a simple example: code Python from flask import Flask, request, jsonify import joblib app = Flask(__name__) model = joblib.load(‘model.pkl’) @app.route(‘/predict’, methods=[‘POST’]) def guess(): data = request.json input_features = [data[‘feature1’], data[‘feature2’]] prediction = model.predict([input_features])[0] return jsonify({‘prediction’: float(prediction)}) if __name__ == ‘__main__’: app.run(debug=False, port=5000) Simple. Reliable. Works everywhere. FastAPI: The Modern Alternative Best for: Building production APIs quickly, when you want auto-documentation and async support FastAPI is newer but it’s gaining fast adoption because it’s genuinely superior for APIs. It handles data validation automatically, generates documentation, and runs faster than Flask: code Python from fastapi import FastAPI from pydantic import BaseModel import joblib app = FastAPI() model = joblib.load(‘model.pkl’) class PredictionInput(BaseModel): feature1: float feature2: float @app.post(‘/predict’) def predict(input_data: PredictionInput): features = [input_data.feature1, input_data.feature2] prediction = model.predict([features])[0] return {‘prediction’: float(prediction)} The main difference is that FastAPI checks your input automatically and makes interactive API documentation available at /docs. You really do get Swagger UI for free. Streamlit: The Data Science Shortcut Best for: Interactive dashboards, demos, and when you want to avoid backend complexity. Streamlit is made for data scientists who don’t want to become full-stack developers. You don’t need an API backend; just: code Python import streamlit as st import joblib model = joblib.load(‘model.pkl’) st.title(‘ML Prediction App’) feature1 = st.slider(‘Feature 1’, 0.0, 10.0) feature2 = st.slider(‘Feature 2′, 0.0, 10.0) if st.button(“Predict”): prediction = model.predict([[feature1, feature2]])[0] st.success(f’Prediction: {prediction}’) Deploy to Streamlit Cloud

How to Deploy an ML Model: From Jupyter Notebook to Production API Read More »

mlflow

Introduction to MLflow: Tracking Your Experiments Like a Pro

MLflow: A Professional Way to Keep Track of Your Experiments   The Issue That No One Talks About (But Everyone Has) You spend weeks working on a model for machine learning. You change the hyperparameters. You try out different algorithms. You do 50, 100, or even 200 experiments. Then disaster strikes: you can’t remember which set of parameters gave you the best results. Your laptop has a lot of notebooks on it. The names of your CSV files are hard to understand, like model_v3_lr0.01_bs64_acc0.82.h5. Your team members don’t know which version of the model is actually being used. Welcome to the nightmare that is the chaos of tracking experiments. This is what most data scientists and ML engineers deal with every day. It’s possible to manage machine learning experiments without the right tools, but it’s very painful, like trying to keep a detailed lab notebook while wearing oven mitts. The best part is that most people don’t know that this problem can be fixed. And what is the answer? MLflow. An open-source platform that makes your messy experiment management into a system that is easy to use and repeat. This guide will teach you everything you need to know about MLflow, including how it works, why it’s important, and most importantly, how to use it to keep track of your ML experiments like a pro. Here’s a visual representation of the iterative machine learning lifecycle, highlighting the key steps from setting business goals to monitoring deployed models. What is MLflow, anyway? MLflow is a free platform that helps you manage the entire machine learning lifecycle. Think of it as a central place where all the parts of your ML projects come together and work well together. MLflow is the tool that data science teams all over the world use the most. It was made by the people at Databricks. MLflow makes it easy to organize, track, and deploy your models, whether you’re working on your own or with a team of 50 data scientists. What makes MLflow so great? It doesn’t care what language or framework you use. MLflow works well with all machine learning frameworks, including Python, R, TensorFlow, PyTorch, scikit-learn, and others. The Four Pillars of MLflow and Why They Are Important There are four main parts to MLflow, and each one solves a different problem in the ML lifecycle: 1. Tracking: Your own journal for experiments MLflow Tracking is where the magic happens. This part keeps track of everything you need to repeat your experiments: Parameters: Your hyperparameters, like the learning rate, batch size, number of layers, and so on. Metrics: measures of performance (accuracy, precision, recall, F1 score, and loss values) Artifacts are any files that your model makes, like saved models, plots, datasets, and images. Versions of the Source Code: The exact code that ran each test MLflow automatically collects all of this information instead of you having to write it down in a spreadsheet or make hundreds of file variations. In MLflow, every training run makes a “run,” which is a timestamped snapshot of your experiment and all of its data. 2. Projects: How to Make Your Code Work Again MLflow Projects is basically a standard way to put your ML code together. It says, “Hey, here’s how to run my project, what environment it needs, and what the entry points are.” Think about giving your project to a coworker and having them run it exactly how you wanted the first time, with no problems setting it up. That’s what Projects is all about. 3. Models: The Universal Format for Packaging MLflow Models gives your trained models a standard wrapper. This is a big deal because models come in a lot of different types, like TensorFlow SavedFormat, PyTorch .pth files, and scikit-learn pickles. MLflow says, “I don’t care what format your model is in. I’ll package it so that anyone can load and use it anywhere.” 4. Model Registry: Your Main Place for Versioning The Model Registry is the place where models that have been registered are stored. In short, it’s version control for your ML models. You can see all the versions of a model, move models from one stage to another (Development → Staging → Production), and keep track of each model version’s whole lifecycle. Here’s an infographic summarising the four main components of the MLflow platform: How MLflow Tracking Works (Without All the Boring Terms) Let’s say you’re using different hyperparameters to train a random forest model. This is what MLflow does: code Python import mlflow from sklearn.ensemble import RandomForestClassifier from sklearn.model_selection import train_test_split from sklearn.datasets import load_iris # Load the data iris = load_iris() X_train, X_test, y_train, y_test = train_test_split( iris.data, iris.target, test_size=0.2 ) # Start a run in MLflow with mlflow.start_run(): # Write down your parameters mlflow.log_param(“n_estimators”, 100) mlflow.log_param(“max_depth”, 10) # Teach the model model = RandomForestClassifier(n_estimators=100, max_depth=10) model.fit(X_train, y_train) # Keep track of your metrics accuracy = model.score(X_test, y_test) mlflow.log_metric(“accuracy”, accuracy) # Keep the model mlflow.sklearn.log_model(model, “model”) That’s all. MLflow automatically records everything and keeps it safe. No spreadsheets. No naming files by hand. Just tidy up and clean the experiment data. The Game-Changer: Autologging This is where MLflow starts to seem almost magical. You can turn on autologging for well-known frameworks. You don’t have to write any extra code for MLflow to automatically log parameters, metrics, and models. code Python import mlflow # Turn on autologging for your framework mlflow.autolog() # Now just train like normal model.fit(X_train, y_train) # Everything is automatically recorded! TensorFlow/Keras, PyTorch, scikit-learn, XGBoost, LightGBM, Spark MLlib, and many more frameworks are supported. This is huge because it makes things easier. You go from “I need to remember to log this” to “it just happens.” Most modern data scientists are already using these frameworks, so autologging feels like a cheat code. MLflow vs. Other Tools for Keeping Track of Experiments (The Real Talk) There are other tools on the market, such as Weights & Biases, Neptune, Comet, and more. So how does MLflow

Introduction to MLflow: Tracking Your Experiments Like a Pro Read More »

the-feature-store

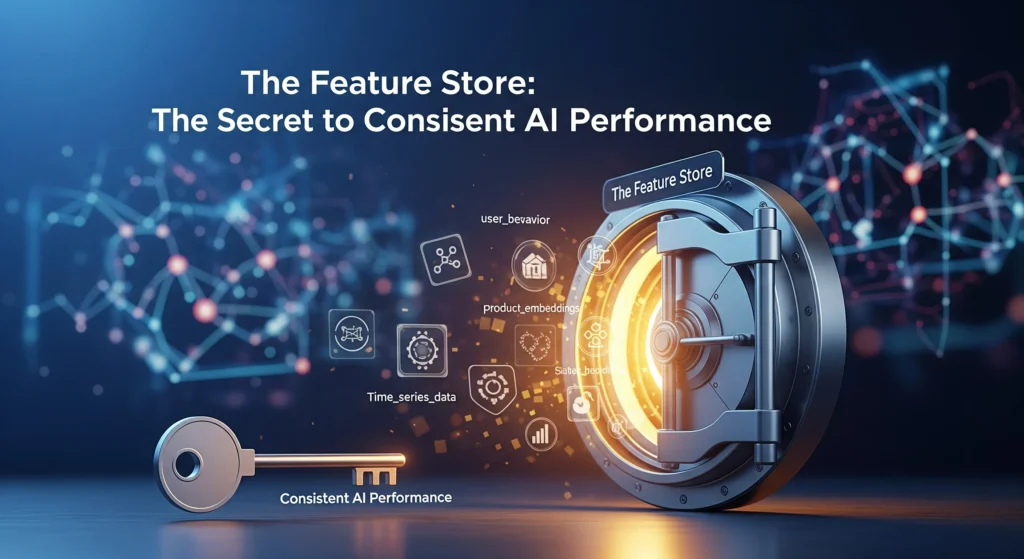
The Feature Store: The Secret to Consistent AI Performance

Introduction: The Feature Store: The Key to AI That Works Every Time You know that awful feeling when your ML model works perfectly in development but fails in production? Yes, we’ve all been there. Who did it? Features that don’t always work the same way. Your data scientists spend weeks making the perfect features for training, but then engineering teams have to build them all over again for deployment. Different logic, different timing, and different outcomes. It’s like playing telephone with your data; by the time it gets to production, the message is all messed up. That’s where feature stores come in, and they are really changing the way AI teams work all over the world. What Is a Feature Store, Anyway? Let’s stop using technical language for a moment. Think of a feature store as a library where all of your machine learning features live, breathe, and are served to your models. It’s not just a place to keep things. It’s a whole system that keeps track of, manages, and delivers the same features to both your training pipelines and your production models. Here’s what makes it special: instead of data scientists and engineers working in separate groups and making the same features twice with slightly different ways of doing things, everyone uses the same source. One definition, one way to do things, and the same results every time. Taking Apart the Parts A feature store isn’t just one thing; it’s a collection of parts that work together: The Feature Registry is like a list. It keeps track of all the features you’ve made, who made them, when they were last updated, and how they’re calculated. Think of it as your encyclopedia of features. The Offline Store takes care of old data. This is where you keep a lot of feature data for training models and making batch predictions. It’s made to handle a lot of data, not to be fast, and it usually lives in data warehouses like Snowflake, BigQuery, or S3. Speed is what the Online Store is all about. This is where your model looks when it needs features to make predictions in real time, like finding fraud in milliseconds. We’re talking about Redis, DynamoDB, or other databases with low latency that can serve features in less than 10 milliseconds. Feature Pipelines link everything together. They turn raw data into features and make sure that both stores are up to date. Why Your ML Team Needs This Right Now Come on, it’s hard enough to make ML models. But keeping them running in production? That’s where teams really have a hard time. The Problem with Training and Serving Skew This is probably the most annoying thing about ML in production. Your model learns patterns during training by looking at certain features. But if those features are calculated even a little bit differently in production, your model’s accuracy goes down the drain. Think about training a fraud detection model with a customer’s “average transaction amount over 30 days.” You do the math perfectly when you train it. But in production, someone accidentally codes it as “average over 15 days.” Now your model is making decisions based on inputs that are completely different from what it learned. Not good. Feature stores get rid of this problem by making sure that the same logic for computing features runs everywhere. Time is money (for real) It’s not talked about enough that data scientists spend 60–80% of their time on feature engineering. That’s weeks of work, and a lot of the time you’re just making features that are already in use somewhere else in the company. With a feature store, one person makes a feature, writes down how to use it, and then everyone can use it. The fraud team, the personalization team, or anyone else who needs it can use your recommendation team’s “user engagement score” again. Companies say that after using feature stores, their time to production is 40% faster. That’s a big change that will change the game. Trust is built on consistency. It’s impossible to be consistent when features are spread out over notebooks, scripts, and different codebases. Different teams figure out features in different ways. Over time, definitions change. No one knows for sure which version is “right.” Your one source of truth is a centralized feature store. Features are documented, versioned, and the same in all environments. Your CFO wants to know about that ML model that predicts when customers will leave. You can really say what data went into it and when. How Myntra Made Personalization Work in the Real World Let’s look at a real-life example that shows how useful feature stores can be. Myntra, India’s top online fashion store, had a common problem: how do you make shopping experiences unique for millions of customers without your systems crashing? The Problem During peak sales times, they were handling over 500,000 users at once and 20,000 orders per minute. Their machine learning ranking models had to quickly pull hundreds of features about users, products, and interactions without making customers notice any lag. Their original plan to use Redis for feature lookups was not working. The system was too slow, which made things worse for the user. Because the feature store couldn’t keep up, customers were getting generic homepages instead of personalized ones. The Answer Myntra built a dedicated feature store architecture that uses Aerospike. This is what changed: They put all of the customer behavior data—like browsing history, buying habits, size preferences, and brand preferences—into one high-performance system. Now, the feature store could handle 100,000 to 400,000 feature requests per minute, with latencies of less than 40 milliseconds at the 99th percentile. More importantly, the same features that were used to train their recommendation models were now being used to fill personalized homepages in real time. No more skew between training and serving. No more problems. The Results The effect was big. Myntra’s personalized widget recommendations got more clicks, their infrastructure costs went

The Feature Store: The Secret to Consistent AI Performance Read More »

data-is-more-important-than-your-ai-model

Why Data Is More Important Than Your AI Model

Introduction to Why Data Is More Important Than Your AI Model In today’s competitive world, the saying, “Data is more important than your AI model,” is more true than ever. Even though new models get a lot of attention, the quality, relevance, and depth of the data are what really matter for the success and longevity of any AI project. This article talks about why data is more important than models, shares personal and professional views, answers popular industry questions, and gives useful tips for both new and experienced tech professionals. The Main Point: Why Your AI Model Isn’t as Important as Your Data If your data isn’t good enough, the complexity of your underlying model—whether it’s a simple logistic regression or a cutting-edge transformer—doesn’t matter as much as you might think. The saying “garbage in, garbage out” sums up the idea that models are only as smart as the data you give them. Poor data quality, not model choice, has almost always been the reason why machine learning systems have failed or not worked as well as they should have Models Change, but Data Lasts AI models are like fashion: what was “must-have” last year quickly goes out of style as new frameworks and architectures come out. Quality data, on the other hand, never goes out of style. The data of a business is what sets it apart from its competitors, not the most recent change to an LLM or convolutional neural network. Google, Amazon, and Tesla all became leaders not just by making their algorithms smarter, but also by gathering, organizing, and using huge, high-quality datasets. It is easy to get and protect models, but robust datasets are much harder to get and protect. “Which is better: AI, ML or Data Science?” —The Truth “Which has more scope: data science or artificial intelligence?” is a question that many students and professionals ask. Both fields are related, but data science is often the basis for everything that AI builds on. The main job of data science is to get insights from data, clean it up, label it, and get it ready for AI to use later. When you pick a field to specialize in, keep in mind that even the best AI is useless without good, reliable data. So, studying data science opens up a lot of career options that will last The Data–Model Tradeoff: Which is more important, accuracy, performance, or foundation? Another common argument is: “Which is more important: how well the model works or how accurate it is?” This is usually a mistake. One measure is accuracy, and another is performance, which looks at how a model works in real-life situations, such as its speed, ability to scale, and ability to apply to other situations. But if your data is wrong, neither of these matters. In real life, a simpler model with great data usually does better than a complicated model that was trained on data that was noisy or biased. My Experience: Clean Data and Simple Models Win In client projects that involved finding SEO content, even simple classifiers did much better than complex neural networks that had been trained on hastily scraped data when they were given a lot of high-quality labeled data for website text. Data cleaning, feature engineering, and making sure the data is relevant to the domain were always the “secret sauce.” This is similar to what Kaggle Grandmasters say all the time: 80% of winning solutions are about preparing the data, not building fancy models. The Pay Debate: AI vs. Data Science The “data science vs. artificial intelligence” rivalry is often fueled by salary trends. Recent salary surveys show that data scientists’ median salaries are competitive with those of ML engineers. In fact, they can be even higher for leadership roles because they are in charge of data pipelines, analytics teams, and setting up the organization for future AI projects. Specializing in data governance, compliance, and analytics can lead to unique high-paying jobs. Role Median Salary in India (2025 est.) Size and Growth Data Scientist ₹12–20 Lakhs a year A lot of demand for analytics. ML Engineer/AI Dev ₹10–18 Lakhs a year Demand from new businesses Data Engineer ₹14–22 Lakhs per year Fast rise, core to AI “Why Is Data Important in AI?”—Key Takeaways Reducing bias: Data variety and coverage help prevent bias, which even the best models can’t fix if the data is not balanced. Generalization: Models can only do well on new, unseen scenarios if they have a lot of different, representative data. Trust and Explainability: In fields like healthcare and finance, where compliance with rules is very important, data pipelines that can be audited and are well-documented make systems more open and honest. Real-Life Examples: The Competitive Edge of Data That Lasts The Self-Driving Fleet of Tesla: The technology is great, but the real benefit comes from having millions of miles of proprietary, correctly labeled driving data. Voice Assistants: Amazon Alexa and Google Assistant didn’t just get better because of smarter deep learning. They also learned from a wider range of audio samples in different languages, accents, and settings. Healthcare AI: Strong patient data allows for earlier diagnoses and tailored care, which is better than models that learn from small or noisy data. Why You Should Focus on Data Analytics in Your AI Journey It’s easy to see why data analytics is important in AI: it helps you understand your data, find holes in it, and keep an eye on how changes in data distribution affect how models work. For people who want to get a degree in artificial intelligence and data science, data analytics skills help them connect the dots between how technology can help businesses and how it can change the world. What should you focus on when it comes to courses and degrees? Modern courses, whether they are called “artificial intelligence and data science” or “AI and ML,” should always put the important steps of preparing, wrangling, and validating data first. Students who

Why Data Is More Important Than Your AI Model Read More »

version-control-for-machine-learning

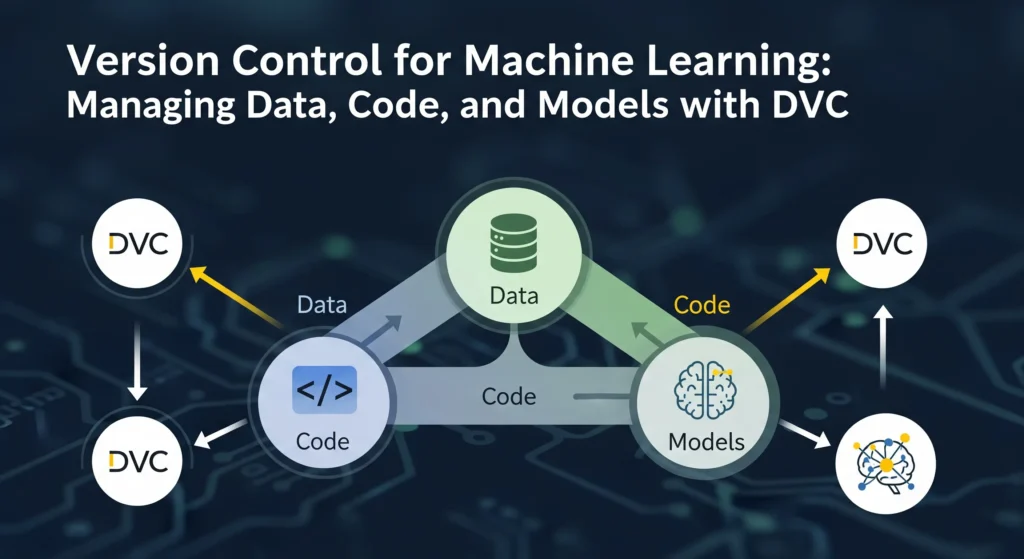
Version Control for Machine Learning: Managing Data, Code, and Models with DVC

Introduction to Version Control for Machine Learning:  Imagine that you are a data scientist who just spent three weeks training a machine learning model that got 92% of the answers right. Your group is excited. But what happens when you try to get the same results a month later? Nothing is working. The model is only 78% accurate, and no one knows why. Does this sound familiar? You’re not the only one. A huge 87% of machine learning projects never make it to production. One of the main reasons for this is that it’s hard to keep track of, reproduce, and manage the messy mix of data, code, and models. Software engineers figured out how to fix this problem decades ago with tools like Git. Data scientists have been trying to figure it out ever since. DVC, or Data Version Control, is what you need here. It’s like Git’s cool cousin who can really handle your 50GB datasets and billion-parameter models. By the end of this post, you’ll know how DVC works, why it’s important for ML teams, and how to start using it right away without having to get a DevOps degree. What’s the big deal about version control for machine learning? Let’s get to the point: why can’t you just use Git for everything? You could try, though. Git was made to keep track of text files, like your Python scripts, configuration files, and documentation. It completely stops working when you throw a 10GB image dataset or a 500MB trained model at it. There is a reason why GitHub limits files to 100MB. But here’s the thing: machine learning is not the same as regular software development. You are no longer just changing code. You’re juggling: Big sets of data that change over time (new data is collected and preprocessing steps change) Models that have been trained and are basically binary blobs that are hundreds of megabytes or more in size Experiment setups with dozens of hyperparameters Training pipelines with several steps that depend on each other Performance metrics from hundreds of tests Your results can change a lot when any of these things change. And if you can’t keep track of what changed, you can’t do your work again. That’s not good. The ML reproducibility crisis is real. Studies show that 70–85% of AI projects fail, and the main reason is problems with data. Studies have found that 648 papers in 30 different academic fields had problems with reproducibility. DVC: Git for Data Science DVC (Data Version Control) was made just for these kinds of problems. The open-source community made DVC, and now thousands of people support it. DVC builds on Git’s version control features to help with the special problems that come up in machine learning workflows. The best part is that DVC works with Git, not instead of it. DVC takes care of your data and models separately, while Git keeps your code where it belongs. It’s like having two teammates: one is great at keeping track of code changes, and the other is great at dealing with big files. How DVC Really Works The best thing about DVC is how easy it is to use. DVC doesn’t store your real data files in Git. Instead, it makes small .dvc files that point to them. These pointer files are very small, usually only a few kilobytes, and they have: A hash that is unique to your data file Details about where the real data is kept Information about the file’s metadata Git does keep track of these .dvc files. When you commit your code, you’re also committing these small pointers that say, “This version of the code used this version of the data.” The real information? That goes to a “remote storage” location, which could be Amazon S3, Google Cloud Storage, Azure Blob Storage, or even just a network drive. DVC does all the pushing and pulling of data to and from these remotes, just like Git does with code on GitHub. It’s really smart. Setting Up DVC Is Easier Than You Think DVC is really easy to get started with, which is one of the best things about it. You don’t have to be a DevOps expert or know a lot about complicated infrastructure. I’ll show you how to do it. Putting it in place First, set up DVC. If you use Python (and let’s face it, you probably do), it’s as easy as: code Bash install dvc with pip Install the right extension if you want to use cloud storage like AWS S3: code Bash pip install ‘dvc[s3]’ DVC works with many cloud providers right away, so it doesn’t matter if your team uses AWS, Google Cloud, or Azure. ` Your First DVC Task Let’s say you already have a Git repository set up for your ML project. The first step in setting up DVC is to run one command: code Bash git init # if you haven’t done it yet dvc start This makes a .dvc folder that holds DVC’s settings and cache. You should commit this initialization: code Bash git add .dvc/config and .gitignore “Initialize DVC” is what you should type in git commit. Keeping track of your first dataset Now comes the fun part: telling DVC to keep an eye on your data. Let’s say you have a folder called “data/” that has your training images in it: code Bash dvc add data/ DVC processes your data, makes a hash of it, copies it to a local cache, and makes a data.dvc file. This is the file you will send to Git: code Bash Add data.dvc and .gitignore to git. git commit -m “Add training data set” DVC automatically updated your .gitignore file to keep the actual data/ folder out of Git. That’s smart, right? Linking to Remote Storage You need to set up a remote storage space to share your data with your teammates or back it up. Here are the steps to make an S3 bucket your

Version Control for Machine Learning: Managing Data, Code, and Models with DVC Read More »

ml-lifecycle

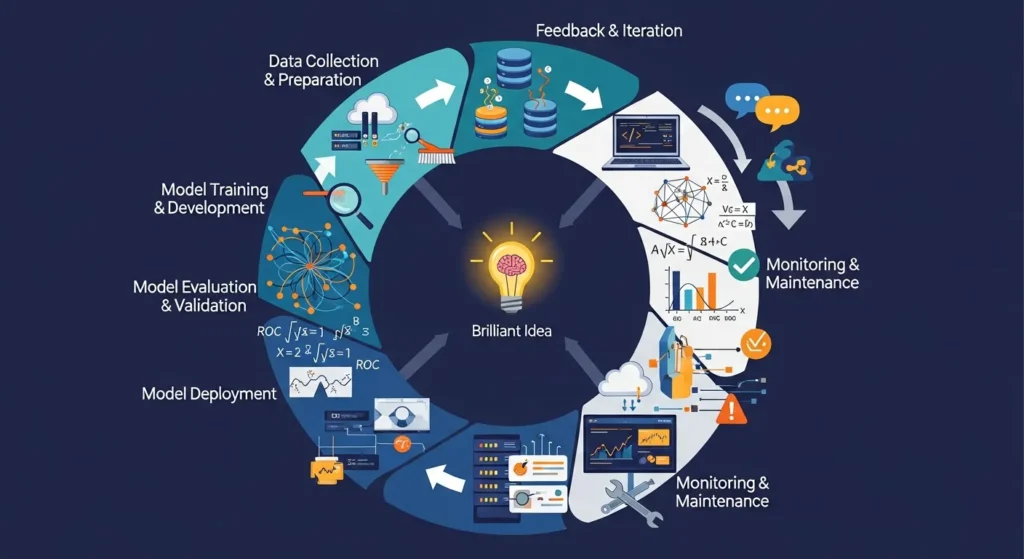
The Ultimate (Machine Learning) ML Lifecycle: From Brilliant Idea to Seamless Deployment and Beyond

The ML Lifecycle: From Idea to Deployment and Beyond Remember the last time you got a great movie suggestion on Netflix or when your phone’s camera knew exactly where to focus? That’s how machine learning works behind the scenes. But here’s the thing: those smart features didn’t just show up out of nowhere. Today, we’re going to talk about the journey they went on, which was pretty intense. People don’t just use the term “ML lifecycle” as a techy buzzword. The actual roadmap takes a simple idea like “hey, wouldn’t it be cool if we could predict customer churn?” and turns it into a working model that makes decisions in the real world. And to be honest? People only see the shiny end result, but the real magic happens along the way. In this post, you’ll learn everything about the process, from that first lightbulb moment to putting your model into use and what happens next (spoiler: it never really ends). We’ll go over each step, give you some real-world examples, and talk about the problems you’ll run into. You’ll know how ML projects work in real life, not just in theory, by the time you’re done. Seven important steps in the machine learning lifecycle shown as gears that are connected to each other What Is the ML Lifecycle?Let’s get started. The ML lifecycle is the whole process that a machine learning model goes through, from beginning to end and beyond. It’s not something you do once and forget about. It’s more like taking care of a plant. You can’t just throw seeds in the ground and leave them there. You have to water it, make sure it gets enough sunlight, cut off the dead leaves, and check on it often to make sure it’s healthy. The ML lifecycle includes everything, from figuring out what problem you’re trying to solve to planning how to solve it, gathering and preparing your data, building and training your model, putting it into production, and then keeping an eye on it and making it better. Each step builds on the one before it, and sometimes you have to go back to the beginning when things go wrong. What sets ML apart from regular software development? Well, with regular software, once you write the code and it works, you’re pretty much done. But what about ML? Because the world keeps changing, your model needs to keep learning and changing. Customer behavior changes, new trends come up, and all of a sudden, that model you trained six months ago isn’t working as well as it used to. Step 1: Figure out what the problem is and what the business goal is. Okay, this is where it all begins, and it’s probably the part that gets the least attention. It’s surprising how many teams start building models without really thinking about what they’re trying to solve. A big mistake. Putting the Problem in the Right Light You need to ask yourself, “What’s the real business problem here?” before you even think about data or algorithms. The business problem, not the ML problem. It’s not a problem to say, “We want to use machine learning.” But saying, “We’re losing 20% of our customers every quarter and need to figure out who’s likely to leave so we can do something about it” is a real problem that needs to be solved. Here’s the trick: make sure that everyone, not just the data science team, can understand it. Your stakeholders and business people all need to understand it. And the problem should be one that ML can really help with. A simple rule-based system or even better analytics can sometimes do the trick. Setting Success Metrics Once you know what your problem is, you need to know what success looks like. Is it about making things more accurate? Getting rid of false positives? Save money? No matter what it is, you should be able to measure it and connect it to business results. You can’t improve something if you can’t measure it, and you definitely can’t show your bosses that it’s worth the money. Think about whether you’re working with classification, regression, clustering, or something else entirely. Are you trying to guess categories, like spam or not spam, or continuous values, like the price of a house? This sets the stage for everything else. Step 2: Collecting and Getting Ready the Data Okay, now we’re really getting down to business. Machine learning runs on data, and if your data is dirty or low-quality, your model will sputter and die. Where do you get your data? You can get data from a lot of different places, like internal databases, third-party vendors, APIs, sensors, user-generated content, web scraping, and more. Finding trustworthy sources that really give you what you need is the most important thing. And yes, sometimes the data you need isn’t available yet, so you have to go out and make it. People don’t talk about this enough: having a variety of data is important. Your model will be biased and not work well for everyone else if your training data only includes one group of users. Make sure you see the whole picture. Cleaning and Getting Ready Data that hasn’t been cleaned up is messy. Like, really, really messy. There will be missing values, duplicates, outliers, inconsistencies, and all sorts of other problems. That’s all done during data preprocessing. You will clean it up, make sure the formats are the same, deal with any missing values (maybe by filling them in or getting rid of them), and get everything into a shape that your model can use. This step can take up to 60–80% of your time on an ML project, and that’s normal. Don’t hurry it. A model that was trained on bad data is worse than not having a model at all. Feature Engineering: The Secret Sauce This is where things get interesting. Feature engineering is the process of making new variables from your current data

The Ultimate (Machine Learning) ML Lifecycle: From Brilliant Idea to Seamless Deployment and Beyond Read More »